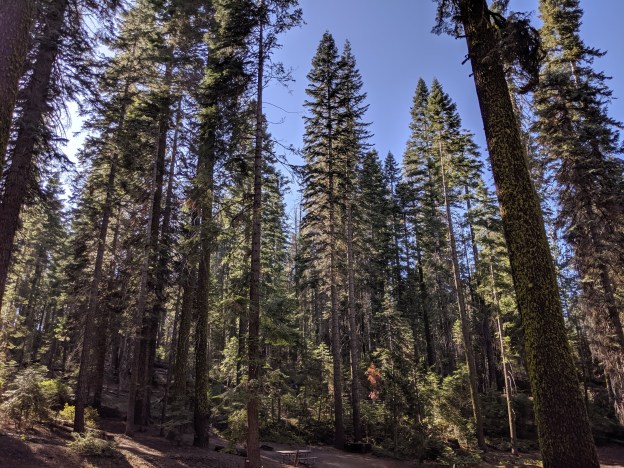
I took some time away from work and family to decompress in nature.
I’ve previously written about Afton State Park (K-2466) near my QTH here in Minnesota. It is a beautiful park located on the shore of the St. Croix river which separates Minnesota and Wisconsin.
The hike into the campsites is not tremendously long at just about 1 mile, but there is both a steep downhill and uphill section that can get the heartrate up a bit, so I chose to go lightweight this trip.
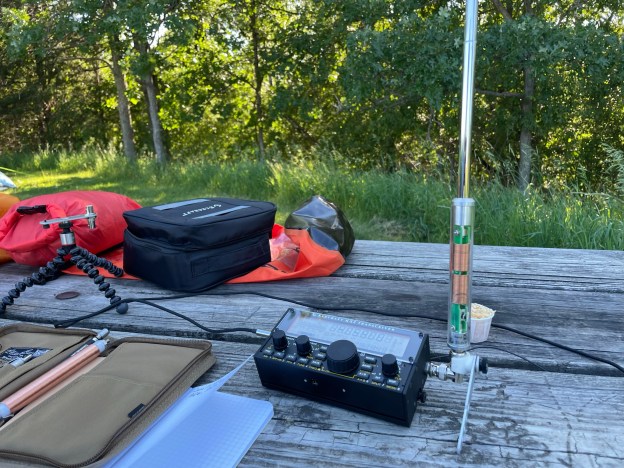
Equipment included:
Elecraft KX2 (new to me – more on that in a follow up post)
Elecraft AX1 antenna
BaMaTech BaMaKey TP-111 (see previous post for a review)
I knew going into this that the AX1 is a severely compromised antenna, however I didn’t want to haul in a throw line to run an EFHW or dipole, nor did I want the weight and mass of one of my larger verticals.
This was going to be, and was a challenge.
In the end, I logged 5 contacts. Signal reports weren’t great – as expected – but I greatly appreciate the effort those old men put forth to pull my signal out of the ether. Given I was on 20 meters, no surprise to see the distances for each contact.
Along my CW journey – which I am still trudging along on – I have benefited greatly from Kurt Zoglmann (AD0WE) and his site Morse Code Ninja (link).
Kurt has produced literally weeks and weeks of audio files of various categories in speeds of 15-50wpm (*gulp* – that speed just sounds like noise to me still), all of which is freely available for download. You can see the dozens of categories on his Practice page (link).
His YouTube channel additionally has videos of the audio files so you have multiple options for playback.
Example Video
Given how many hours I’ve spent using his work over the last year plus of my learning CW, and how many others I’ve spoken with that have also benefited, I am suggesting that a small donation to continue to fund his efforts is a good thing that, if able, you should consider doing.
He has a link to do so on his contact page (link).
No I am not affiliated with him or his site, just a very grateful consumer of his efforts.
Having a software development background I know how time intensive projects like his can be, and for him to put it out there for everyone to use freely speaks to his love for the hobby and desire to grow it even more. Hosting a website and having bandwidth for file download isn’t cheap, and I like to encourage people like him to continue so that we can all benefit for years to come.
I’ve been licensed since 2008, and though I’ve seen mention of Wilderness Protocol, I’ve never been clear on what that means.
I generally carry an HT when I venture out into the woods, and I definitely carry one along with my vehicle mounted mobile when I’m traveling cross country. Cell phone coverage is generally good, but…
Knowing that the 2 meter and 70 centimeter calling frequencies are 146.520 and 446.000 respectively, I never gave much more thought to what to use beyond having those programmed into my HT.
I came across a couple of articles recently that were both news to me, and a common sense approach to both receiving help in a time of need, and to being willing and able to lend help.
This is probably old news to many, but I’m posting here to increase visibility and keep as a reference for myself.
Hopefully it is useful to you and you never need it.
Overview
This is what the ARRL has published on the matter:
The Wilderness protocol (see page 101, August 1995 QST) calls for hams in the wilderness to announce their presence on, and to monitor, the national calling frequencies for five minutes beginning at the top of the hour, every three hours from 7 AM to 7 PM while in the backcountry. A ham in a remote location may be able to relay emergency information through another wilderness ham who has better access to a repeater. National calling frequencies: 52.525, 146.52, 223.50, 446.00, 1294.50 MHz.
ARRL ARES Field Manual pg. 87 (linked above)
I am hoping that this is helpful to folks, especially now as temperatures are warming up here in the northern latitudes and more people are getting outdoors.
Have fun out there! (safely)
The featured image in this post is from Yosemite National Park, taken during our family road trip in 2019
I’ve had a couple of days to play with the new (tr)uSDX 5-band transceiver and I thought I would do a quick post to show my initial impressions of this kit.
Overview
The (tr)uSDX Radio is a project created by DL2MAN and PE1NNZ, based off of the uSDX project.
It covers 5 amateur bands – 80/60/40/30/20 meters and is multi-mode – CW, SSB (LSB|USB), and AM/FM.
There is an onboard speaker and a mic, though external ones are recommended.
Please keep in mind that this project’s intent was to (through the use of group buys, etc.) allow for a user to acquire the necessary parts for about $50 USD. With the supply chain issues affecting the whole world right now, sourcing parts is increasing that cost quite a bit, so authorized suppliers like those they’ve partnered with are one of the only reliable methods of getting everything in an easy fashion.
Please also keep in mind that this radio is not an IC-705 or a KX2. It is not meant to be, and my comments below will be framed within the context of what this radio is, not what it isn’t.
It’s Here!
Note that I ordered two – one pre-assembled with the case, and one that is the raw kit without the case (I’m 3D printing my own).
This gives me the opportunity to see if there are any advantages to either method other than price. That and I like radios.
It is an addiction.
It arrived safe and sound on Thursday, April 7th. My first impressions when receiving the box was:
“OH NO!”
Those fears were unfounded as the rig was well padded inside with very thick and sturdy bubble wrap.
Packaged in the box is the radio and an unterminated power cable.
The bubble wrap they used is not the standard type that is seen in packaging all over, rather it is of a series of long inflated tubes. The material is quite a bit stronger than typical bubble wrap and takes a lot more effort to puncture.
A+!!!
Part of building the (tr)uSDX is loading the boot loader, then using the serial number to download a personalized firmware image.
The supplier does all that for you, and provides a label on the packaging including the serial number for your reference when doing firmware upgrades.
If you lose it, the only way to see your serial number again is to re-flash the boot loader and erase the existing firmware.
So far so good.
Before getting anything powered up and on the air we needed a power cable. The supplied cable is a 3.5mm to 1.35mm DC plug. It is smaller than the standard 5.5mm to 2.1mm plugs that most radios accept, and so you will need to either attached some connects to the bare ends of the plug, or get an adapter.
I found an adapter on Amazon that lets me avoid using yet another set of Powerpoles and instead use the existing plugs I have to bring the size down to what this radio needs. You can grab a set at on Amazon at https://www.amazon.com/dp/B07FJLZGPF?th=1
Or you can attach a set of connectors of course.
The Radio
The supplied case is 3D Printed and feels like it is done out of PETG. The quality of the print is quite good – the details are all there, the seams are solid and it just feels sturdy. The orange feels like the same shade of orange sherbet ice cream – kind of washed out in color.
I think if I had to do it over again I might have chosen the other color which is an olive drab. I say that as a fan of the color orange.
Just nit-picking on my part.
The case design, is in my opinion, superb. Everything was well thought out. There are four individual side pieces, and a top and bottom piece. The sides have internal slots that the PCBs fit into, securing them in place.
There is absolutely no wiggle room in any part of the case. Everything is tight and snug.
The tuning knob is also 3D printed, and fits tightly onto the stem without worry about falling off. There is no set screw, nor is there one needed.
It is all held together by 8 flat headed screws.
The whole case (minus the knobs, screws, and BNC adapter) measures 60.5mm by 90mm by 30mm.
Or in other words, about 2/3s the length and width of my iPhone.
It is tiny.
They must have a dual nozzle printer, or at least one that is capable of pausing to change out filament colors as the raised lettering is black filament printed on the orange base. It isn’t painted.
The power portUSB power and PAThe bottom of the rig – if you look closely you can see that the left side – in the middle – has a slightly darker rectangle. That is a thinner section that can be removed to allow direct access to the AVR programming pinsThe working end of the radio – Mic/Key port, Audio port, and the BNC to SMA connector (included) The RF board in all its glory! Note that all the windings are evenly spaced, and everything is neat and tidy.
Size Comparison with QCX-mini
Size-wise the two radios are extremely close, with the (tr)uSDX only slightly thicker front-to-back.
That makes the capabilities of this little transceiver even that more amazing to me – it is multi-band and multi-mode in a package that is similar to, what I think anyway, is the best portable single-band CW rig available.
There are tradeoffs for that though as we’ll see shortly. (again, not speaking to that as a negative, rather recognizing that this is a jack of all trades type radio and not a master of one, whereas the QCX-mini does one band and CW extremely well)
First Time Powering On
Upon powering up the radio, you are greeted with your callsign on a brightly lit interface. The onboard speaker is quite small, and results in a ringing tone when driven by too high of volume as to be expected given the size.
It automatically shuts off when an audio cable is inserted for an external speaker or headphones.
There are four buttons – Menu, Enter, PTT, and the tuning knob can be depressed for certain menu navigations, and the speaker rounds out the front face of the case.
There are built-in calibration tools, including a meter that shows power output and relative efficiency.
Out of the box I got the following:
Band
Power Output
Efficiency
80 meter
7.88 Watts
76.62%
60 meter
6.54 Watts
89.86%
40 meter
6.87 Watts
89.48%
30 meter
7.78 Watts
88.18%
20 Meter
7.06 Watts
86.87%
I’m comparing that to what others are seeing and, after watching DL2MAN’s calibration video, I may tweak things just a bit.
Not too much though – its pretty good out of the box.
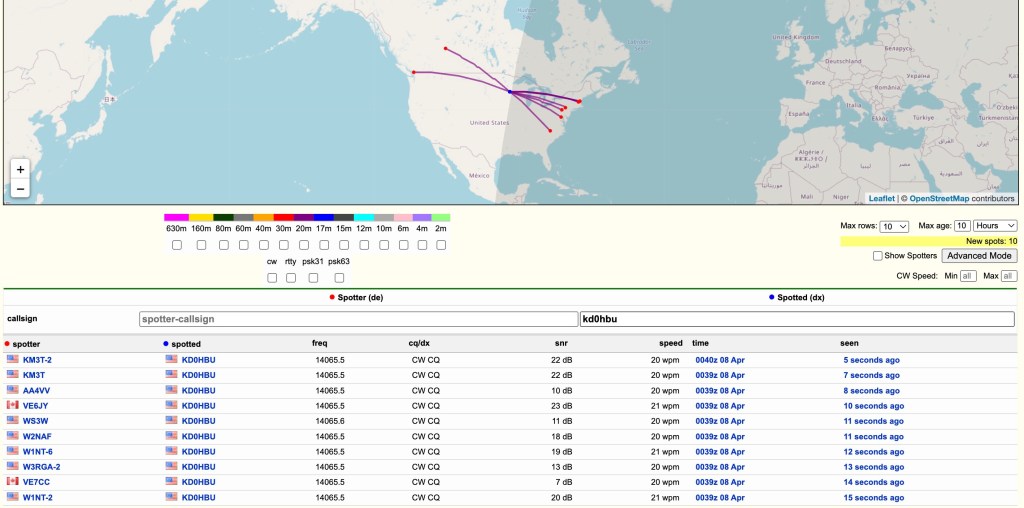
Next step was to get this on the air and see what RBN could see.
I hooked it up to my 20m Dipole which is suspended about 39-40 feet up in a tree.
Ok – so we know it gets out there 😉
I did call CQ a few times and even tried hunting a POTA activator or two, but given the time of day and the low power, I wasn’t getting through. I don’t think that is the fault of the rig, rather that I had only a bit of time that day to even try.
That and given 20 meter propagation, I generally can only reach the east, south, and west coats of the US that time of day, and the activators were all on the edges of that.
Oh well – more tries I guess are needed.
The audio quality is not as clear as I would have liked, even at this price point. The noise floor of the rig using an external speaker is still quite high. Playing with the noise attenuation settings can help, but there is a persistent static that you have to work through.
The Menus
This is where I need a lot more time with the radio.
DL2MAN has a page on his site that details all the menu options so I’m not going to go through them here. I will just say that it will take me a few times using the radio before I’m used to which button or knob does what.
That is not a negative, just the reality of the radio due to size, etc.
I will also say, however, that it is easier to navigate than my Mountain Topper MTR4B.
They’ve done a great job in trying to make the various navigation options clear and concise.
Audio
I’ve mentioned the audio already, and I just uploaded a small clip of both SSB and CW audio samples of live QSOs.
I will apologize for the ringing in the audio – I didn’t do a separate audio track overlay and the camera mic isn’t handling the external speak audio very well.
Final Thoughts
I have a lot more time that I need to spend with this little rig before I can fully say, with any degree of authority, how it performs in real use. I haven’t been this excited to get a new radio in a while – there is just something about the type of rig they’ve created here that really gets me going – and so far I am not disappointed.
My initial thoughts on pros/cons (note that the cons are nitpicking on my part – it really is a lot of radio in a small package)
Pros
Cost
Size
Multi-band
Multi-mode
Built-in mic
Built-in speaker
Can be bought assembled, as a kit, or you can get the parts together to build yourself
Supports Iambic A/B, and Straight Key modes
Cons
Different power cable connector than any other radio I own (small radio so other connectors would add bulk)
The OLED display can be hard to read in bright light (read outdoors)
Needs an SMA to BNC connector (supplied, but another thing to keep track of, though again it is expected given the size of this radio)
The speaker isn’t performant at any volume that you might need outdoors (at least not if there is anything making additional noise around you) – also expected given the size
Really, there isn’t a lot of cons at this price point and size.
This radio represents a tremendous advancement in small, portable radios that can be assembled at home and used in the field. Like I said previously, it is a lot of radio in a small package. I wouldn’t use it as a main POTA/SOTA rig full time, but I also haven’t had any field experience with it yet so I might eat those words.
This is a boon to amateur radio operators that people like DL2MAN and PE1NNZ are putting these out there for the public to take and create. Even if you never build or buy one of these radios, I believe they deserve a huge thank you from all of us for their efforts and time.
You can read about the project, including how to source the parts at DL2MAN’s website at http://dl2man.de